Spring Flower Bouquet
AGE RANGE
Projects should be easily acommplished by ages 5 and up with help from parent or guardian.
APPROXIMATE TIME
2 hours
This week with ARTmobile@home we will be using paper to create a beautiful flower bouquet to celebrate spring. Create blooming flowers for your bouquet by cutting and rolling beautiful colors of paper.
Educational Outcome
A hands on project that teaches different ways of manipulating paper in order to create 3D pieces of art. Children can use this project to recognize the changes in the seasons and how it impacts the flowers and plants outside.
Art Materials Needed

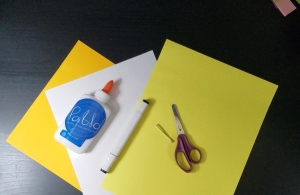
- Colored Paper
- Scissors
- Tweezers
- Glue
- Marker
Project Instructions
- Take a piece of colored paper and fold it in half horizontally four times, repeat this step with three or four other colors.
- Cut along the crease lines on each piece of paper, creating strips.
- Now cut slits in the strips, careful to not cut the strip into separate pieces.
- Once the slits have been cut, roll up the strip of paper using a pair of tweezers.
- After rolling up the strip of paper, glue the edge down and set aside to dry.
- Repeart this process several times with your other strips of paper.
- Once the glue has dried, spread apart the slits so that the paper resembles a blooming flower.
- Take another piece of colored paper and draw a circle on it.
- Cut out the circle and then set aside the rest of the paper for later.
- Glue the circle to the bottom of a piece of white paper.
- Using the piece of paper you set aside cut out a rectangle for the base of your vase.
- Glue the rectangle piece on the bottom of the circle to make the vase.
- Now start gluing the flowers down in a circular rotation at the top of your vase, creating a bouquet.
- Once all the flowers have been glued down, you can write a special message or design in the circle part of your vase.
- And there you have it, a flower bouquet with blooming flowers!